Ensuring your parking lot is in top shape is not just about aesthetics; it’s a crucial preventative measure against structural damage that can lead to costly repairs. Whether you’re a property owner or a facility manager, understanding the ins and outs of crack sealing can save you time and money in the long run. In this guide, we’ll delve into the fully DIY approach to filling those pesky crevices, giving your parking space the care it deserves and prolonging its life, regardless of the punishing Canadian climate.
Table of Contents
Introduction to Parking Lot Crack Sealing
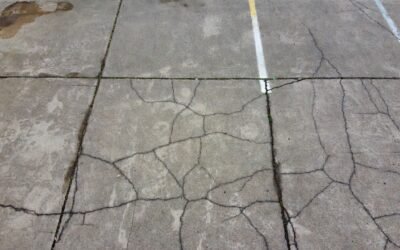
The relentless cycle of freezing and thawing is a well-known adversary for Canadian roads and parking lots. It can turn a hairline fissure into a gaping maw that is not only unsightly but also a potential hazard to vehicles. Timely crack repairs are essential: they prevent water infiltration, additional freeze-thaw damage, and sub-base degradation—key culprits behind larger potholes and eventual pavement failure.
What Causes Asphalt Cracks?
Understanding the enemy is the first step to an effective defence. Several factors contribute to the fracturing of asphalt:
- Weather Impact: The freeze-thaw cycle, UV radiation, and moisture are relentless forces that coax the cracks out of hiding.
- Wear and Tear: The constant stress from vehicles, particularly heavy loads, taxes the asphalt’s resilience.
Fun Fact: The world’s longest network of roads is right here in Canada, boasting over 1.04 million kilometers – plenty of ground for potential cracks!
Weather Impact and Wear and Tear are the primary culprits. In regions with drastic seasonal weather changes, like most of Canada, the freeze-thaw cycle wreaks havoc on asphalt. Water seeps into small crevices, freezes, and expands, pushing the asphalt apart and creating larger cracks. Come summer, UV rays can further degrade the pavement, while heavy vehicles continually flex and fatigue the weakened surfaces.
Key Takeaway: Regular attention to your parking lot can forestall more serious issues down the line – similar to getting your car’s oil changed to avoid engine damage.
Understanding these factors isn’t just academic; it equips you with the knowledge to choose the correct sealant type and apply it in conditions that maximize its effectiveness.
Most Common Causes of Asphalt Cracks
| Rank | Cause of Cracks | Description | Prevention/Treatment |
|---|---|---|---|
| 1 | Thermal Expansion and Contraction | Changes in temperature cause the pavement to expand and contract, leading to cracks over time. | Use of temperature-adaptive sealants and regular sealing can mitigate effects. |
| 2 | Water Penetration | Water seeps into and under the pavement, causing erosion and weakening the sub-base, which leads to cracking. | Proper drainage and timely sealing of existing cracks are essential. |
| 3 | Oxidation and UV Radiation | Exposure to sunlight and air causes the asphalt binder to harden and become brittle, resulting in cracks. | Periodic application of a protective seal coat can slow oxidation. |
| 4 | Heavy Loads and Traffic | Consistent traffic, especially heavy vehicles, can stress the pavement and lead to cracking. | Designing the pavement to withstand expected loads and proper maintenance are key. |
| 5 | Poorly Constructed Pavement | Poor construction techniques or inadequate materials can result in an asphalt surface prone to cracking. | Ensure high-quality installation and materials from the start. |
| 6 | Vegetation Growth | Roots from trees and other vegetation can exert pressure on the pavement from below, leading to surface cracks. | Root barriers during construction and removal of invasive vegetation can help. |
| 7 | Chemical Spills | Oil, gas, and other chemicals can weaken the asphalt, leading to surface degradation and cracking. | Clean spills promptly and use sealants resistant to chemical damage. |
| 8 | Edge Cracking | Lack of support at the pavement edge can cause cracks to form and propagate from the outer edges inward. | Ensuring proper support and reinforcement at the edges during construction. |
| 9 | Reflective Cracking from Underlying Layers | Existing cracks in lower pavement layers can propagate to the surface layer, becoming visible as cracks. | Using interlayer systems can alleviate reflective cracking. |
| 10 | Improperly Filled Joints | Joint construction is crucial in asphalt pavement; improperly filled joints can lead to crack formation. | Correct and timely filling of joints during initial pavement installation. |
Now that we understand the importance of timely repairs and the causes behind cracking asphalt, let’s get our hands dirty and dive into the DIY approach of keeping your parking lot smooth and serviceable.
Preparing for Your DIY Crack Sealing Project
Ready to tackle those craggy asphalt scars head-on? Preparing for your DIY project is not just about gathering tools and materials—it’s also about assessing the task ahead and ensuring you’re up for it. You don’t want to be halfway through the job only to realize you’re missing a crucial tool or the weather isn’t on your side. So, let’s set the stage for a successful crack-sealing operation that meets your goals without hitting a snag.
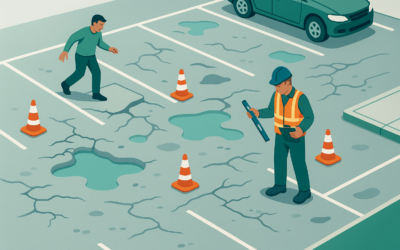
Assessing Your Parking Lot
Begin with a thorough inspection of your parking lot. Look out for different types of cracks such as alligator cracks, slippage cracks, and edge cracks, as each type may require different treatment methods. Note down the locations and severity, tallying up the rough square footage that needs addressing.
Tools and Materials Checklist
Gear up with the right tools and materials before jumping into the fray. Here’s a comprehensive checklist to help you prepare:
- Crack cleaning tools: A wire brush or a crack cleaning machine
- Crack filler material suitable for the climate and traffic level
- An applicator tool, like a trowel or a melter-applicator
- Safety equipment: Gloves, goggles, and long clothing
- Weather check: Ideal conditions forecasted for the job duration
Popular Quote: “By failing to prepare, you are preparing to fail.” – Benjamin Franklin
As you get ready, remember, crack sealing is not only about fixing what’s broken. It’s a strategic approach to extending your parking lot’s life and ensuring it remains a safe, welcoming space for vehicles and pedestrians alike. Strap in; it’s time to learn the basics and get cracking!
Approach your preparations with the resolve of a crack-sealing crusader, and you’ll be paving the way (pun intended) to a more durable and reliable parking surface. But remember, while going the DIY route is commendable, there’s no shame in calling in the pros for more complex jobs. —that’s just being smart and responsible.
Tools and Materials Explained
| Tool/Material | Why It’s Needed | Usage |
|---|---|---|
| Wire Brush | For removing debris and loosening particles from the crack surface. | To manually scrub the inside of the crack to ensure it’s clean prior to applying sealant. |
| Crack Cleaning Machine | For efficient removal of debris from larger cracks or for cleaning a significant number of cracks. | Used to provide a thorough clean that ensures better adhesion of the sealant. |
| Asphalt Crack Filler | Acts as the sealant to fill and seal the cracks, preventing water infiltration and further degradation. | Applied to cleaned cracks to restore the integrity of the parking lot surface. |
| Trowel or Squeegee | For evenly spreading and smoothing the crack filler over the repair area. | Used to smooth out the sealant for a flat and even surface finish. |
| Asphalt Degreaser | To dissolve and remove oil-based stains that could prevent the sealant from adhering properly to the asphalt. | Applied to spots with oil or chemical stains before crack cleaning. |
| Safety Gear (Gloves, Goggles, Long Clothing) | To protect oneself from chemicals, heat, and debris during the cleaning and sealing process. | Worn throughout the project to ensure safety from potential hazards. |
| Blower (or Leaf Blower) | For removing fine particles and dust from the cracks after the initial cleaning with a brush. | Used to expel all remaining debris from crack surfaces post-scrubbing. |
| Crack Pour Pot or Melter Applicator | For precisely applying hot-applied crack fillers and distributing them evenly into the cracks. | Used to transfer the melted hot-applied sealant into the cracks during the application process. |
| Broom or Stiff Brush | For sweeping away loosened debris after brushing the cracks. | Employed after wire brushing to clean the area around the crack. |
| Heat Lance or Propane Torch | For drying out the cracks completely before applying the sealant, especially if water is present. | Used to quickly dry the cracks and assist the evaporation of any moisture in the crack. |
| Backer Rod | For filling deep cracks and creating a base for the sealant application, which conserves the amount of sealant used. | Inserted into deep cracks to provide a bottom for the sealant to rest on. |
| Sealcoat | To protect and extend the life of asphalt surfaces by providing a protective layer against elements like UV rays, water, and spills. | Periodically applied over the entire asphalt surface after repairs have been completed. |
| Marking Tape or Cones | To mark off the repaired areas, preventing traffic from crossing over until the sealant is fully cured. | Used to cordon off the work area during and immediately after the application of sealant. |
Step 1: Cleaning the Cracks
Successful crack sealing is heavily dependent on proper preparation. The first and most crucial step is ensuring the cracks are impeccably clean; any dirt, debris, or vegetation will hinder the adhesion of the sealant to the asphalt, compromising the quality of your repair. Let’s delve into the cleaning process that will lay a pristine foundation for your sealing efforts.
The Importance of a Clean Work Area
Cleanliness is next to godliness – even when it comes to parking lots. The goal is to clear away all impediments that could prevent the sealant from bonding completely with the crack walls. This step cannot be overlooked or rushed, so take your time to get this right.
Recommended Cleaning Techniques
Equip yourself with a wire brush, a broom, and if needed, a crack-cleaning machine for larger or more stubborn debris. Start by vigorously brushing the cracks, followed by a thorough sweep to remove loosened grit. For organic matter like weeds or moss, consider using a specialized weed-killing treatment a few days before the repair to ensure the removal of any roots that could undermine your sealing work.
For a superior clean, a blower can be employed to expel all the fine particles the broom could not capture. And should the cracks be stained with oil or hydraulic fluids, they’ll require an additional degreasing step. In this case, use an asphalt degreaser that’s safe for the environment and your pavement.
A handy tip is to schedule your cleaning on a dry day, as moisture can also hamper the sealing process. If water is present in the cracks, use a heat lance or a small propane torch to dry them thoroughly, but do so with caution and appropriate safety gear.
With a desolate, dust-free crevice staring back at you, you’re poised to make a repair that not only lasts but also merges seamlessly with your lot’s landscape – a smooth operator’s dream.
Step 2: Choosing the Right Sealant
With the cracks clean and yearning for filler, it’s essential to choose the right sealant for the job. This isn’t a one-size-fits-all situation; various factors such as the climate, crack size, and the level of parking lot traffic play a pivotal role in the selection process. So let’s understand the options and make an informed decision that aligns with your parking lot’s unique requirements.
Understanding Different Sealant Types
Sealants typically come in two varieties: hot-applied and cold-applied.
- Hot-applied sealants are melted before application and are famed for their durability and adhesion properties, making them ideal for climates with temperature extremes—like the hearty Canadian weather.
- Cold-applied sealants, on the other hand, are ready-to-use and suitable for smaller jobs and milder climates.
Other sealant factors to consider include elasticity, which is crucial for withstanding temperature-induced expansion and contraction, and load-bearing capacity, especially if your lot is frequented by heavy vehicles.
How to Pick the Best Sealant for Your Climate and Traffic
Choosing the right sealant for your climate involves understanding its temperature resilience. In Canada, where winters can be harsh, a sealant that withstands low temperatures without cracking is vital. During warmer months, it should be soft enough to expand without losing its bond.
Regarding traffic, consider the volume and weight of vehicles traversing your parking lot. For heavily used lots, or those accommodating freight liners or buses, opt for a high-performance sealant that promises longer life under stress.
Resist the temptation to skimp on quality. A stellar sealant can be the difference between a quick patch-up and a substantial, long-term fix. Don’t let your sterling cleaning work go to waste by settling for a subpar product.
Suit up, grab your gloves, and with your perfectly picked pot of sealant in tow, you’re on your way to bridging those cracks with the confidence of a seasoned road warrior.
Step 3: Applying the Sealant
Sealant chosen and at the ready, it’s time to apply your newfound knowledge practically. Filling and sealing cracks is more than pouring and hoping; it requires technique and finesse. Here we break down the application process into manageable chunks, ensuring you achieve a near-professional finish without actually dialing one up.
Filling Cracks: Tips and Tricks
The trick to a successful application is to fill the cracks from the bottom up, eliminating any air pockets that could lead to future weaknesses. If the crack is deeper than half an inch, consider using a backer rod to conserve sealant. Pour carefully, and don’t overfill; the sealant should be flush with the asphalt surface for a smooth transition.
Troweling for a Smooth Finish
Once the crack is filled, use a trowel to smooth out the sealant, blending it with the surrounding pavement. This not only makes it aesthetically pleasing but also ensures no excess material creates a hazard or affects the performance of the sealed crack.
Remember, haste makes waste—allow the sealant ample time to cool and cure following the manufacturer’s recommendations. This patience pays off in longevity and robustness, traits that are non-negotiable in the world of asphalt maintenance.
Drying and Curing: Patient for Perfection
Good things come to those who wait—this couldn’t be more true with sealants. Don’t subject your newly sealed cracks to traffic until fully cured; otherwise, you risk deforming them under load and undoing all your hard work. Mark off the area if needed, and stand guard over your fresh seal like a true pavement sentry.
Each step you take in this process is integral to maintaining a surefooted parking landscape. So, focus on the job at hand, and follow these steps like a diligent DIYer on a quest for the perfect crack seal.
Once you’ve finished with these initial headings, you’re already making great strides in protecting your asphalt investment. There’s more to cover, but for now, sit back, admire your progress, and prepare for the next phase of your journey to become a true asphalt aficionado.
Step 4: Assessing Your Work

Just as an artist steps back to assess a masterpiece, take a moment to survey the fruits of your labour. A careful inspection ensures that your efforts have not been in vain and that your parking lot is ready to face the elements and traffic with resilience. Let’s look into how you can check the sealant application for quality and longevity.
Quick Checklist for Quality Assurance
Once you’ve given the sealant ample time to cure, carry out a methodical inspection. Here’s a concise checklist to aid in your review:
- Sealant level: Confirm that it’s flush with the asphalt’s surface.
- Adhesion: Check the edges for signs of poor adhesion or sealant peel-off.
- Smoothness: Ensure there are no bumps or excess material on the sealed area.
- Consistency: Look out for any inconsistencies in the cured sealant.
- Cleanup: Verify the area around the repair is clean and free from accidental spills.
Addressing Common Application Issues
If you encounter any imperfections, don’t panic. Minor bumps can be smoothed out with a trowel, while sealant spills can be gently removed with an asphalt cleaner. For areas lacking adhesion, a touch-up with additional sealant may be necessary. Remember, it’s better to spot and rectify these issues now than face early wear and tear.
| Issue | Symptoms | Possible Causes | Solutions |
|---|---|---|---|
| Sealant Adhesion Failure | Sealant peeling away or not sticking to the crack edges. | Surface contamination, wet or cold cracks, improper sealant temperature. | Clean the area again, dry thoroughly, reheat sealant if necessary, and reapply. |
| Uneven Sealant Level | Sealant is higher or lower than the asphalt surface. | Overfilling, underfilling, or inconsistent application. | Use a trowel to smooth out excess sealant or apply more if the level is too low. |
| Bumpy or Uneven Finish | Visible bumps or ridges in the cured sealant. | Poor troweling technique or debris in the sealant. | Reheat and smooth out the sealant or remove debris and reapply sealant. |
| Cracks Reappear After Sealing | New cracks form or old ones re-emerge in the same spot. | Sub-base issues, seasonal shifts, or insufficient crack filling. | Investigate sub-base or wait for optimal conditions; apply a second layer of sealant if necessary. |
| Sealant Not Curing Properly | Sealant remains tacky and doesn’t harden over time. | Low temperatures, high humidity, application too thick. | Allow for more curing time or apply heat to aid in the curing process. |
| Discoloration of Sealant | Sealant has a different color than expected or shows uneven hues. | Oxidation, UV exposure, or manufacturer defect. | Check product batch for consistency; protect from sunlight if UV sensitive. |
Through thorough inspection, you ensure that your cracks are sealed not just for today but for many seasons to come. Consider any adjustments you’ve made a lesson learned and a skill sharpened for future maintenance endeavours.
Preventative Measures and Maintenance
Congratulations! You’ve successfully sealed your parking lot’s cracks, but your role as a custodian of the concrete doesn’t end here. Preventative measures and ongoing maintenance are quintessential in extending its lifespan and maximizing your investment. Let’s explore how regular inspections and proactive steps can keep your parking lot in pristine condition.
Regular Inspection Schedule
Create a seasonal inspection schedule to preemptively identify and address new cracks before they expand. Walk through the entire parking lot and take note of any areas of concern, especially after extreme weather events which are common in Canada. This proactive approach minimizes the need for more extensive repairs down the line.
Ongoing Maintenance Tips
Stay ahead of the game with these maintenance must-dos:
- Sealcoating: Apply a protective seal coat every few years to shield against UV rays, water penetration, and spills.
- Drainage: Ensure good drainage throughout the parking area to prevent standing water, a primary cause of asphalt breakdown.
- Load Limits: Monitor the types of vehicles using the lot and enforce load limits where necessary to avoid undue stress on the asphalt.
- Quick Fixes: Address minor problems promptly to prevent them from escalating.
Preventative Maintenance Schedule
| Maintenance Task | Frequency | Season | Details |
|---|---|---|---|
| Regular Cleaning | Bi-weekly to Monthly | All seasons | Remove debris and dirt from the parking lot surface and drainage systems. |
| Crack Inspection | Quarterly | All seasons | Walk the lot to check for new cracks and note any repairs needed. |
| Crack Sealing | As Needed | Spring/Summer/Fall | Seal any new or widened cracks to prevent water infiltration and further damage. |
| Sealcoating | Every 2-3 years | Summer | Apply a protective coat to guard against UV rays, water, and wear and tear. |
| Drainage Checks | Semi-annually | Spring/Fall | Ensure all drains and runoffs are clear of obstructions and functioning properly. |
| Pothole Repair | As Needed | Spring/Summer/Fall | Fill and compact any potholes to maintain surface integrity and safety. |
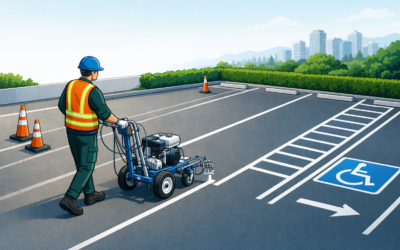
| Line Painting and Markings | Every 1-2 years | Summer | Repaint faded lines and parking space markings for visibility and safety. |
| Surface Levelling | As Needed | Summer | Address any uneven areas where water pools to prevent standing water damage. |
| Landscaping and Vegetation Control | Monthly | Spring/Summer/Fall | Manage surrounding greenery to prevent root intrusion and surface heaving. |
Embrace these preventative practices and your parking lot will not only look professional but will stand a significantly lower chance of developing future cracks and potholes.
When to Call a Professional

DIY maintenance is a worthy pursuit, but recognizing when to call in the cavalry is equally important. There’s a line in the sand where professional expertise becomes necessary, and stepping over it could mean the difference between patching up and patching wrong. Let’s discuss when it’s appropriate to relinquish the trowel to the seasoned hands of a professional.
Identifying Jobs That Are Too Big for DIY
Consider these indicators that it might be time to pass the torch:
- Widespread Damage: If cracks are alarmingly abundant or extensive, it may be a sign of structural failure.
- Alligator Cracking: This pattern of cracks often indicates sub-base problems that require professional repair.
- Time Constraints: If time-sensitive issues prevent proper DIY repair, a professional can expedite the process.
Benefits of Professional Crack Sealing Services
Professional services offer precision, experience, and efficiency. They can diagnose underlying issues, recommend comprehensive solutions, and have access to advanced tools and materials that might not be cost-effective for single-use DIY repairs.
Ultimately, knowing when to enlist professional help is not an admission of defeat—it’s an exercise in wisdom and practicality. It’s about ensuring your parking lot gets the best possible care for long-term durability and function.
Now, with your DIY project concluded and your parking lot safely guarded against the elements, it’s time to shift focus towards maintaining this vital asset with the vigilance it deserves. And should challenges arise that outstrip your toolkit, remember that the pros are just a phone call away, ready to swoop in and seal the deal with expertise and ease.
Need an expert crack sealer? City Wide has over 25 years of experience with all types of asphalt repair in Metro Vancouver.
Reach out to us today. — where professional finish and durability meet for your parking lot needs! Contact us here.

Final Recap
Through meticulous inspection, careful preparation, the correct choice of sealant, and precise application, you’ve taken a significant step in preserving the integrity of your parking lot. This guide has walked you through each step of the DIY crack sealing process, intertwining practical tips with the essential know-how required to achieve professional-level results within the bounds of your own abilities and time constraints.
Regular maintenance, consistent inspections, and an understanding of when to engage professional services will ensure that your parking lot remains not only a testament to your hard work but also a welcoming front to your business or property. Keep this guide handy for future reference, and take pride in knowing you’ve contributed to the longevity of one of the most substantial investments in infrastructure.
Frequently Asked Questions (FAQs)
How do I know when the sealant is fully cured?
The cure time for sealants can vary based on the product, the temperature, and humidity conditions. Always refer to the manufacturer’s guidelines. However, a typical hot-applied sealant could take up to 30 minutes to cool and cure, whereas a cold-applied sealant might take longer. A basic test is to press a finger against the sealant; it should feel dry to the touch and not stick.
What is the best temperature for crack sealing?
The ideal temperature for crack sealing depends on the type of sealant you’re using. Hot-applied sealants require temperatures above 40 degrees Fahrenheit (4 degrees Celsius) for both the air and pavement. Cold-applied sealants are more tolerant of lower temperatures, but applying them in warmer conditions will ensure better adhesion and curing.
How often should I inspect my parking lot for new cracks?
Seasonal changes, particularly from winter to spring and from summer to fall, are critical times to conduct inspections. However, it is best to examine your parking lot quarterly to manage repairs promptly.
Can I seal cracks in the winter?
It’s best to seal cracks when temperatures are moderate. Sealants require specific temperature ranges to adhere and cure correctly. While some cold-applied sealants and special hot-applied sealants can be used in colder weather, for best results, try to plan crack sealing during warmer months.
What should I do if the sealant does not adhere properly?
If you notice that the sealant is not adhering to the crack walls, it could be due to dirt, moisture, or incorrect application. Re-clean the crack, ensure it’s dry, and reapply the sealant according to the manufacturer’s instructions. If problems persist, seek advice from a professional.
Helpful Resources
For further assistance and to ensure you have access to the best materials and information, here are some additional resources:
- Asphalt Institute: An international association of asphalt producers offering educational materials and industry standards.
- National Asphalt Pavement Association (NAPA): A North American organization that provides guidance for pavement maintenance.
- Transport Canada: Provides information on public infrastructure and surface transportation standards.
- Professional Help: City Wide is ready to help you with cracked surfaces across Metro Vancouver. Contact us here.